Church’s locally listed status adds to contractor’s challenges
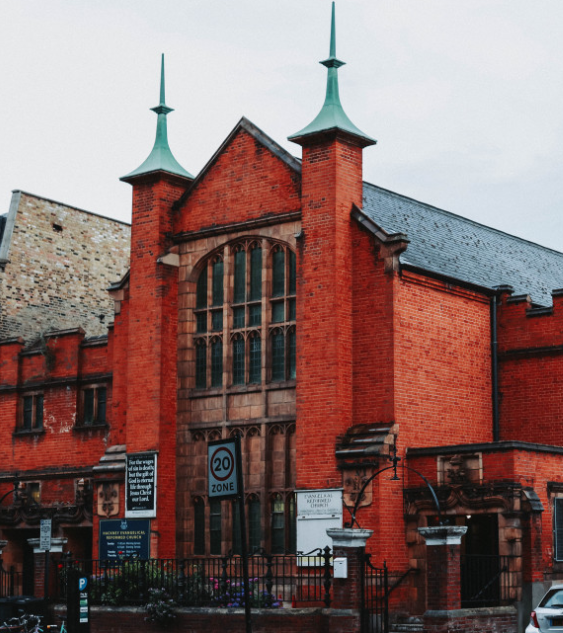
 When Hyssop Project began its first venture into the renovation of a church building, they encountered more than they first expected. The company’s founder and director SHEAHAN THORNE describes how the project developed.
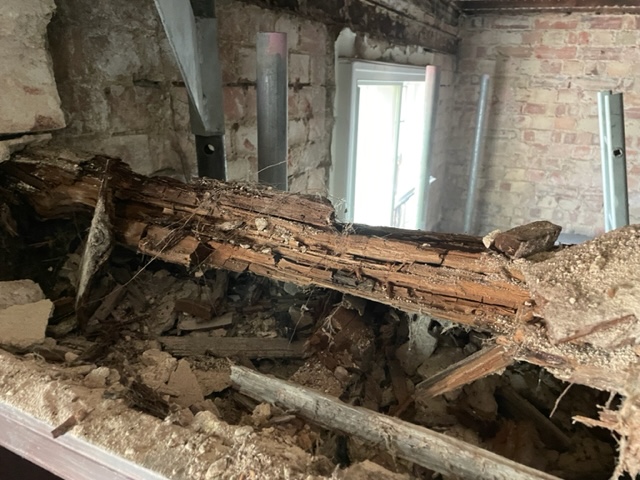
Through an architect friend who attends the Hackney Evangelical Reformed Church on Lauriston Road, Victoria Park, we were initially asked to strip back elements of the building’s internal fabrics which was experiencing severe symptoms of dry rot and wet rot.
Those areas were in the roof structure and behind render in a two-storey stairwell and lobby. It was caused by a continuously leaking roof and a porous brickwork façade, resulting in years of frost damage and erosion, and desperately required replacement bricks and repointing.
The main church roof itself was also experiencing wet rot created by a continuous leak, which was visible from the damage caused to the ceiling in the upper gallery of the church. We were employed as the principal contractor to carry out what would be major remedial works.
In accordance to the local Victoria Park Conservation Area Appraisal by Dr Ann Robey of Planning & Regulatory Services, the Trinity Congregational Church was built in 1901. With a reducing number of people attending, the church was sold in 1991 to the Evangelical Reformed Assemblies, a body of people mostly originating from Monserrat in the West Indies.
Today, the church, now known as the Hackney Evangelical Reformed Church (HERC), has a growing number of people in regular attendance from various backgrounds, with a congregation of over 200 strong visiting the church each week. Having bought the building from a dwindling church congregation in 1991, and now in its 34 years inhabitance, little to no major remedial repairs had taken place to the building for over half a century – only an extension to accommodate a new toilet facility in recent years.
 Internal works
Initially, the church had engaged lead structural engineer Michael Fisher of Pure Structures to diagnose and expose the structural defects within the church building. It was identified that, from the recurring roof leaks in the stairwell, dry rot and wet rot had set in within the roof and ceiling structural supports, along with rotten doorway lintels which had also started to affect the original door frames on the ground and first floors of the staircase.
The required work included the removal of built-in timberwork in the front façade walls and the removal of a section of the upper gallery ceiling, which was also leaking from the main roof itself. Those elements were exposed and removed during the initial investigation work.
Due to the severity of the door lintels, these were immediately structurally propped and replaced with pre-cast concrete lintels to maintain the stability of the internal brickwork walls. Once that first stage was completed a client meeting was held to determine the way forward. The following works were to be undertaken:
- Scaffolding was to be erected on a section of the front façade of the church.
- All timber ceiling joists and roof rafters in the stairwell and lobby within 1,200mm of any dry rot were to be replaced.
- The dry rot spores were to be removed from the walls in the stairwell and the walls in the staircase and lobby chemically injected.
- The lead-box gutter that ran across the stairwell and lobby of the front façade roof was to be replaced, and the roof fabric was to be removed.
- A small section of the main roof (approximately 30m2) over the upper gallery area experiencing the leak was to be removed.
 External works
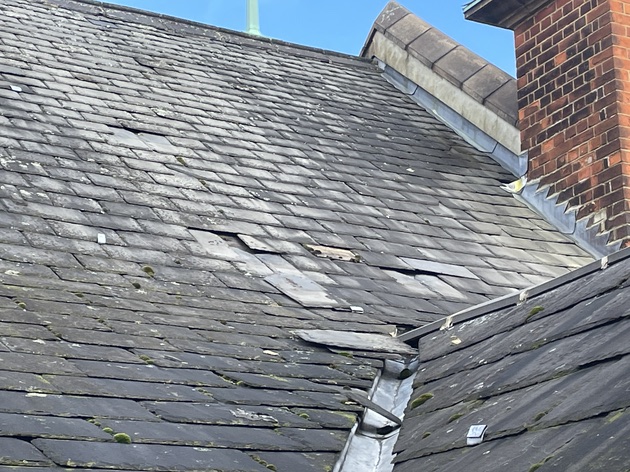
We did not have any external scaffolding on the building at that stage to assess the roof in its entirety, but from the areas we could access safely we could clearly see that there were more issues than first identified. The southern elevation of the main roof generally, and particularly over the upper gallery of the church, was too far gone to salvage: it required a re-roof.
That area was about 200m2. The signs were there, as too many slates were missing and many had slipped out of position, indicating that the slate fixings – which would have been steel – had started to corrode. Even if we were to carry out the necessary repairs locally to resolve the current problems over the gallery it would continue. Each year other slates would work themselves loose and out of position, as the corrosion would be consistent across the roof due to their age.
We also discovered that the roof over the stairwell and lobby had been previously re-roofed at some stage, but with man-made fibrous cement-based tiles (approximately 50m2) and the box gutter dressed using glass reinforced plastic (GRP) – approximately 6m. We did not believe a building of that type should be repaired using such modern-day materials, as they don’t unfortunately have anywhere near the same life cycle as the original materials would have.
When we inspected the northern elevation of the church’s main roof, it was as if we were looking at a different building altogether, as all the slates were still in position, untouched and intact. We came to the conclusion that, as the southern elevation faced Victoria Park, it had been constantly bombarded by any poor weather which came over the open space from the park. The north elevation was completely protected by the ridge and pitch structure of the southern elevation.
However, the north elevation also had a box gutter running the full length of the main church roof – approximately 30m2. Its life also had come to an end and the lead lining required replacing, as there were many cracks and splits in it.
 Scaffolding
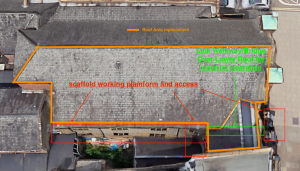
In order to carry out some of the works, much more scaffolding would be necessary on both the southern and northern elevations of the church, providing adequate access and working platforms. We had to erect an independent scaffold the full-length of the southern elevation within the grounds of the church, with a link-bridge working platform over the stairwell lobby roof. That was connected to the front façade scaffolding and would be the main access to the main roof. This link-bridge allowed the re-roofing work to continue on the stairwell lobby roof below.
On the northern elevation a scaffold tower was erected on a low-level flat roof to give access up to the main roof. Along the full length of the northern elevation box gutter a handrail was bolted against the external parapet brickwork to prevent anyone from falling off the side. We used a handrail only because to erect another full-length scaffold would involve pavement permits, as that façade was on the roadside. It would also be more expensive.
Additional cost for the client and congregation
Some of the items were included with the internal Scope of Works identified during the initial strip out; however, the level of building work that was now required would increase the cost dramatically for the client, who would have to explain it to his congregation. Despite the client and the congregation being very much committed to their church and community, the members were very concerned about the increase in work – and who was carrying it out.
This particular church believes in the Biblical principle of tithing and giving offering, where 10% of the congregation’s income is given each month to support the church (Malachi 3:10). That was how the works would be partly financed after years of continuous support. These were the first major repairs for the church since it was purchased in 1989.
The client was also new to the construction industry and Hyssop Project wanted to give them a very good experience, boosting their trust that a building project can go right. As it was their tithes and offerings funding the remedial works, the client asked if we would carry out a presentation to the church members, explaining the work and why it needed to be undertaken, with a questions and answers session raising all their concerns.
Approximately 40 members attended and the session went down very well. They needed to meet the company undertaking the work, which increased their reassurance and confidence that the work was being carried out by a reputable company who understood their concerns about how the project was being funded.
Commencing the remedial work
As the work was about to commence we engaged a private building control company and a CDM principal designer, AGA Associates Ltd, to ensure both Building Control regulations and CDM Regulations 2015 were being fully met. Building control were requesting numerous design requirements which Hyssop Project as the principal contractor was unable to answer, with regard to fire assessments of the building, as well as roof design issues. In trying to establish answers, we approached an ARB RIBA architect, Miguel Eufrasia, with whom we had worked on other projects, about some of the issues.
He asked whether the building was within a Conservation Area, about which at that time we were unsure. Looking into the matter further, not only was the building within a Conservation Area, to our surprise it also held Locally Listed status. The client was totally unaware it was within a Conservation Area and it was also something that had never come up during the time they owned the building. Moreover, they did not realise the local historical and heritage importance of the building they possessed.
That, however, would put all the planned work on hold as Hackney Council Planning Department would need to be informed of the planned remedial work, and a planning application would be necessary. Despite Pure Structures being initially engaged to provide all the structural design, planning consent is not a structural engineer’s role or area of expertise. Therefore we recommended Miguel Eufrasia to the client, whom they engaged as the project architect to address the building control and planning issues.
In the first instance the conservation officer advised that a planning application would not be necessary – saving us two months of application processing – but he would want detailed drawings of all the planned remedial work and repairs. Based on the scope of work, we assisted the architect with the roofing and leadwork requirements, as well as the internal works, with regard to achieving the fire rating with some of the removed items in the stairwell. One challenge posed to the conservation officer was to reuse the existing roof slate on the replacement areas. We were against that for the following reasons:
- The quality of the existing slate cannot be guaranteed. The tiles were over 100 years old and due to varying weather conditions the integrity of the material will be lost over time, making them more brittle than when they were originally fitted.
- The old slate would be deemed second-hand materials, which we would not get a guarantee for from any roofer. The roofer’s guarantee is normally based on labour and materials. If problems arise after the existing slate is reinstated, it will create an argument as to whether it is the labour or the material at fault. The roofer is relying on the materials to provide a robust guarantee for the installation.
- To use the existing slate would require careful removal to limit breakages. That would increase the labour time, invariably increasing the roof cost.
- The use of the existing slate will require far more storage space on the scaffold, which would again increase scaffold cost. Invariably, the amount of material stored on the scaffold will reduce the working platform and could potentially create a hazard.
- Some of the tiles will break during their removal due to ageing and are currently missing. Replacement tiles will be required and to source the various sizes will again increase the cost of the roof installation. The sizes of the tiles were inconsistent across the roof, varying from 1,200 x 750mm to 650 x 700 x 20mm, 500 x 600 x 20mm, 400 x 600 x 15mm and more. They got smaller closer to the ridge: 250 x 500mm and 300 x 600mm. Some of the larger tiles could cost up to £50.00 each due to the size and thickness. We planned to use 600 x 300mm slate as they are the most cost effective and the easiest to source.
- Due to the inconsistent sizing across the roof it would be like refitting a large jigsaw puzzle, which again would slow down the installation and increase the labour cost. Again, we may have found that a lot of the tiled would not be reused or fit due to the jigsaw puzzle affect.
- Mixing the old and new tiles would cause a patchy-coloured roof finish, depending on how many tile were lost during the removal.
Using old and modern materials together
Trying to balance the use of old and modern materials together can be tricky on a heritage building. Our primary objective with this project was to retain all the aesthetic features, but where possible use modern-day materials to improve the performance of the building. We would only implement them with the approval of the conservation officer and building control. Some examples of that on this project are:
 Roofing
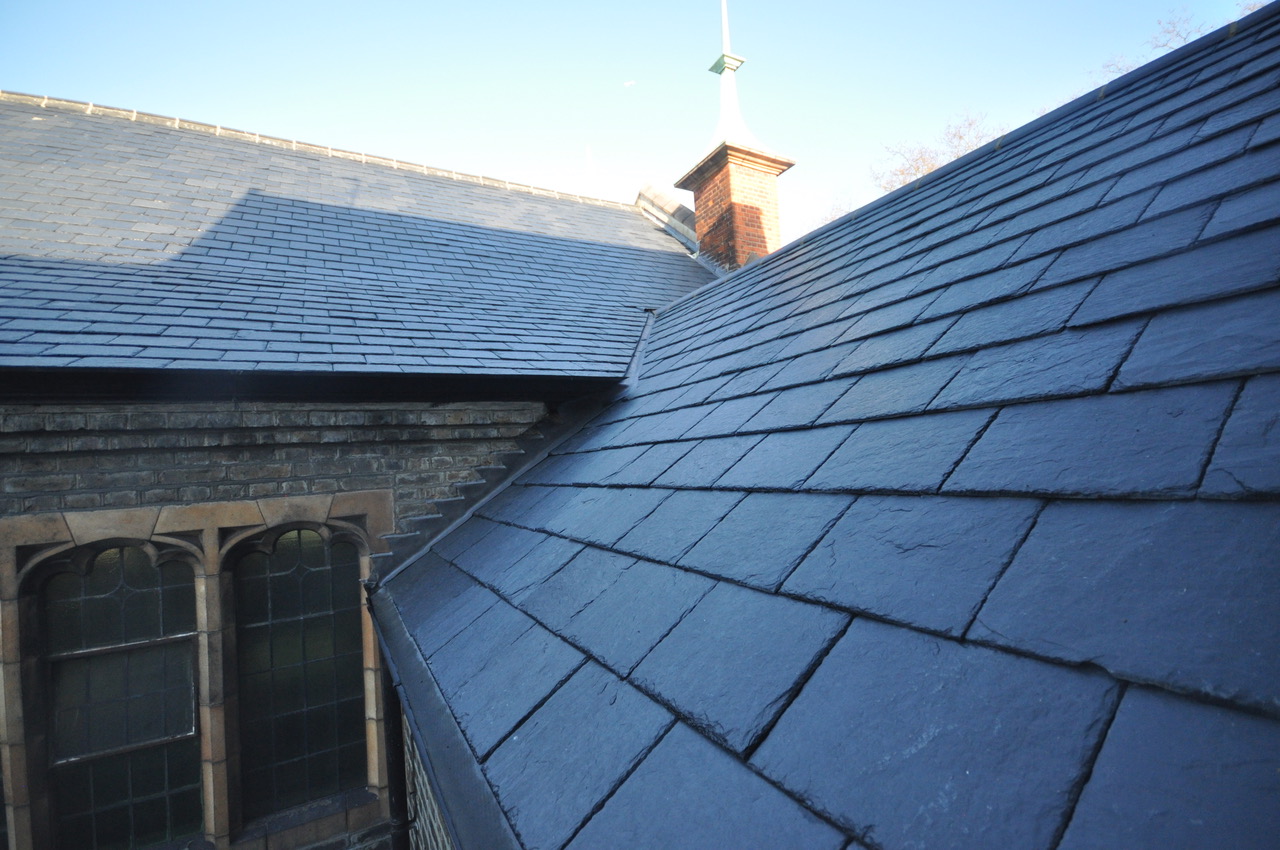
Close boarding: On the roof we decided to reuse the original close-board timber rather than replacing it with modern battens, as it was more cost effective and they were unaffected by the dry rot in that area. There was only a small area that needed replacing and treating due to wet rot in the gallery area where the roof was leaking.
Insulation: As only 200m2 of the 700m2 on one pitch of the main roof was being replaced, from a building control requirement we did not need to introduce insulation into the roof, which reduced cost again for the client on the installation. The introduction of insulation would mean removing all the close-board to install the sheets.
Breathable membrane: Even though insulation was not installed and the new slates were being nailed directly onto the close board with no timber battens, to act as a secondary water barrier we introduced a breathable membrane between the close board and slate.
Ridge tiles: We managed to reuse the original decorative ridge tiles. They were clay based and still extremely solid and strong.
Leadwork
Lead expansion joints: The lead box gutters were reproduced using Code 6 lead, so we introduced lead formed expansion joints with a rubber infill, which should help to reduce the amount of expansion experienced over the full gutter runs – limiting potential cracks and splits across the new leadwork.
Lead mastic: On the lead flashing up-stand joints we applied lead mastic rather than the traditional lime mortar pointing. Again, that should reduce the expansion of those pointing joints, which have the tendency to work loose over time, allowing water ingress into the building.
 Timberwork treatments
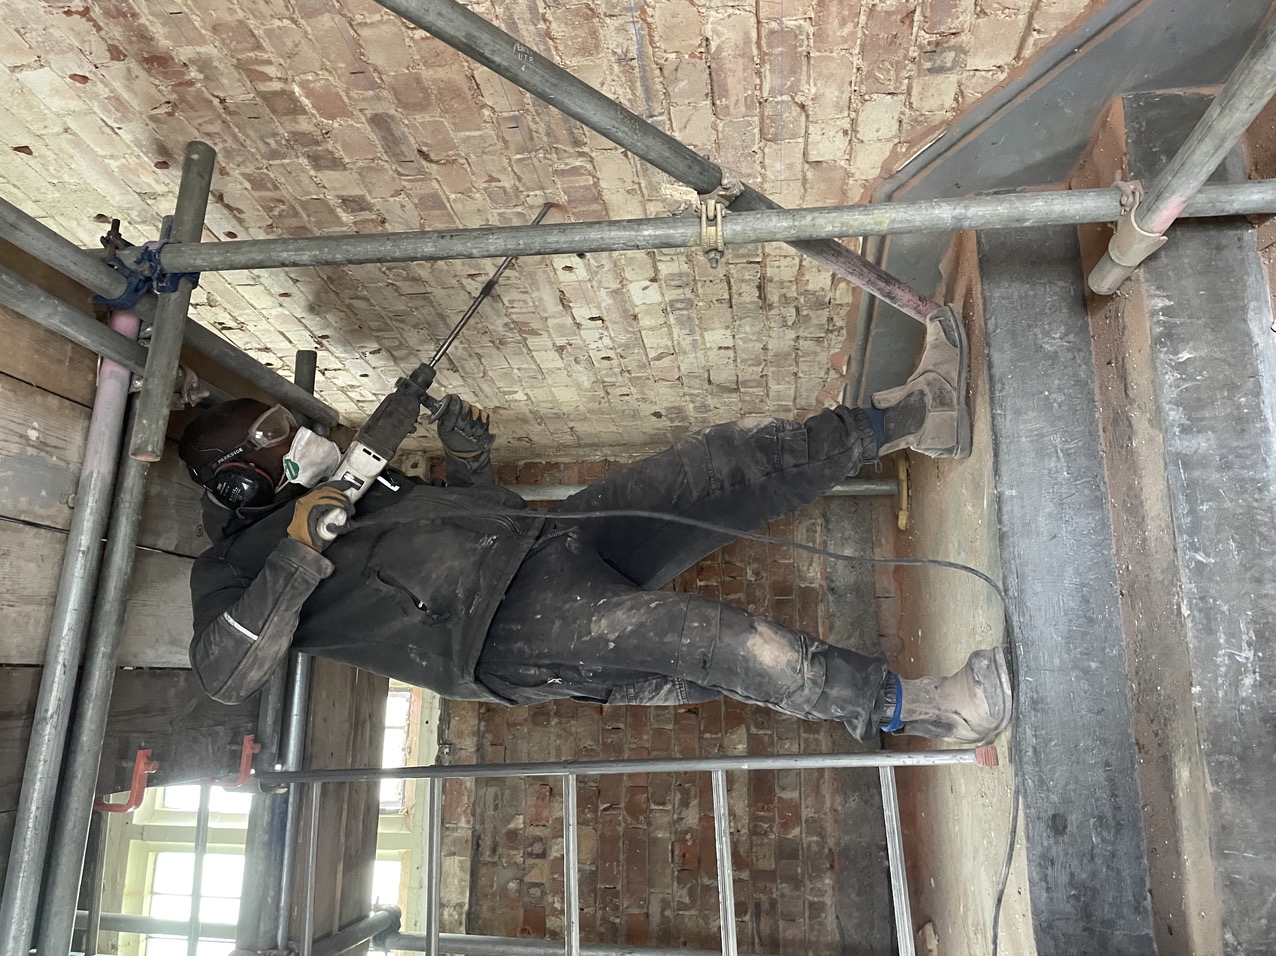
Roof rafters and ceiling joists: Internally we commenced the work in the stairwell by removing all the old timber wall-plate supports on all elevations and replacing them with modern precast concrete lintels. These should never break down and will provide support for the new Tanalised timber roof rafters and ceiling joist which replaced those affected by the dry rot. Before any of those items could be installed, all the brickwork pockets received dry rot treatment.
Wet rot treatment: All the new and existing timber – including the close boarding – was treated for wet rot using an industrial grade water-based microemulsion wood treatment, working to kill wood boring insects and preventing future re-infestation, along with any fungal decay and blue stains.
Internal doors: We wanted to retain the existing internal doors in the stairwell and lobbies as they matched the aesthetics of the timber in the rest of the church. They exhibited no signs of dry or wet rot, so they were also treated with the microemulsion. Building control also advised that they could be reused even though they were not fire rated, because they were the original doors. The door frames, however, were replaced with fire-rated units as they were too close to the affected walls.
 Masonry treatments
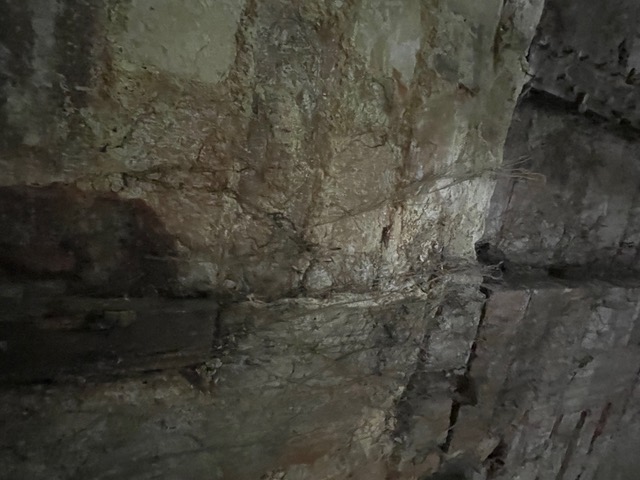
Internal brickwork treatment: The internal brickwork had to be thoroughly cleaned to remove dry-rot spurs from the surface. As the area was quite vast we utilised a mechanical wire brush. Over 1,500 diagonally-drilled holes were bored into the wall, 215mm apart, and it was injected with a modern industrial-grade biocide treatment that penetrates deep into the masonry or brickwork to work against the biological activity of the dry rot fungus. The masonry and brickwork surfaces were also sprayed. Those treatments were undertaken twice and ensure long-term protection against the dry rot fungus returning.
Hyssop Project carried out all the treatment works directly on behalf of the church because, to achieve a guarantee from a specialist, all dry rot-affected timber within a 1,200mm radius must be completely removed. That would have included the complete roof structure over the staircase and lobbies, as well as significant areas of the main roof structure, and the connecting roof valley structure. Also, a scaffolding temporary roof would be required to protect the stairwell from the weather, increasing the cost for the client.
External brickwork façade: During the removal of the roof rafters and ceiling joists in the stairwell and lobbies, within the brickwork pockets they were built into, we could see daylight penetrating through the main external façade, which most certainly allowed water ingress. That was the reason the ends of those timbers and the wall plates had experienced dry and wet rot.
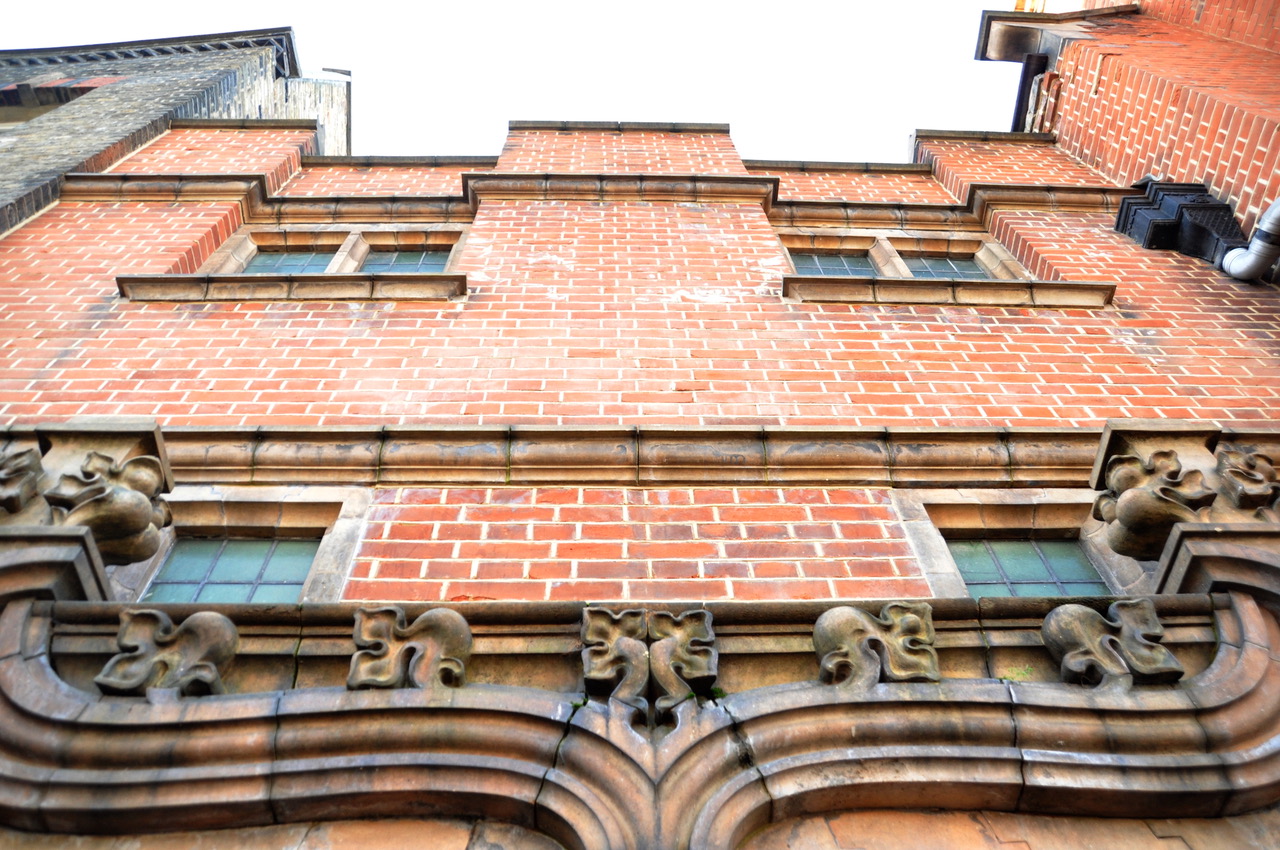 Identifying that during the work opened up another problem as the façade wasn’t part of the remedial works and would need repointing. We had to appoint a brickwork restoration company to do that, to achieve the aesthetic and heritage features.
To our advantage we already had an independent scaffold erected in that position, which was the main access point for the roof work. We only required an additional 2m lift installed for a mid-way working platform.
Again, the original features had to be retained, and over the years some of the soft red bricks were frost damaged. Some 130 bricks had to be cut out and replaced with matching bricks. We managed to obtain a very good match.
There was approximately 60m² of brickwork where the mortar required raking out. Initially, when the restoration contractor started, we anticipated the mortar would be a lime-mix; but the mortar proved so difficult and solid to remove we came to the conclusion that the church may have been built during the transition from lime to cement-based mortar.
That caused further problems as the edges of the soft reds were prone to getting chipped easily, so extra care had to be taken removing the old mortar. Originally, the pointing on the façades was done with a flush finish. Due to the chips created and not being able to remove every single damaged soft red brick, we made the decision to install a square weathered struck pointing finish in a lime mortar mix. Due to cost we were unable to carry out a Doff clean or to apply restorative detergent afterwards. That would have brought the brickwork back to its original finish. Maybe it is something the client could do in the future once they recover from these remedial works.
 Plastering and painting
Ceiling: The original ceilings were of lathe and lime plaster and were removed from the stairwell and lobby areas on the first floor. They were replaced with modern plasterboard, using a 12.5mm foil-backed plasterboard with a 15mm fireline and 3mm plaster skimmed, to achieve a one-hour fire rating. That was approved by building control.
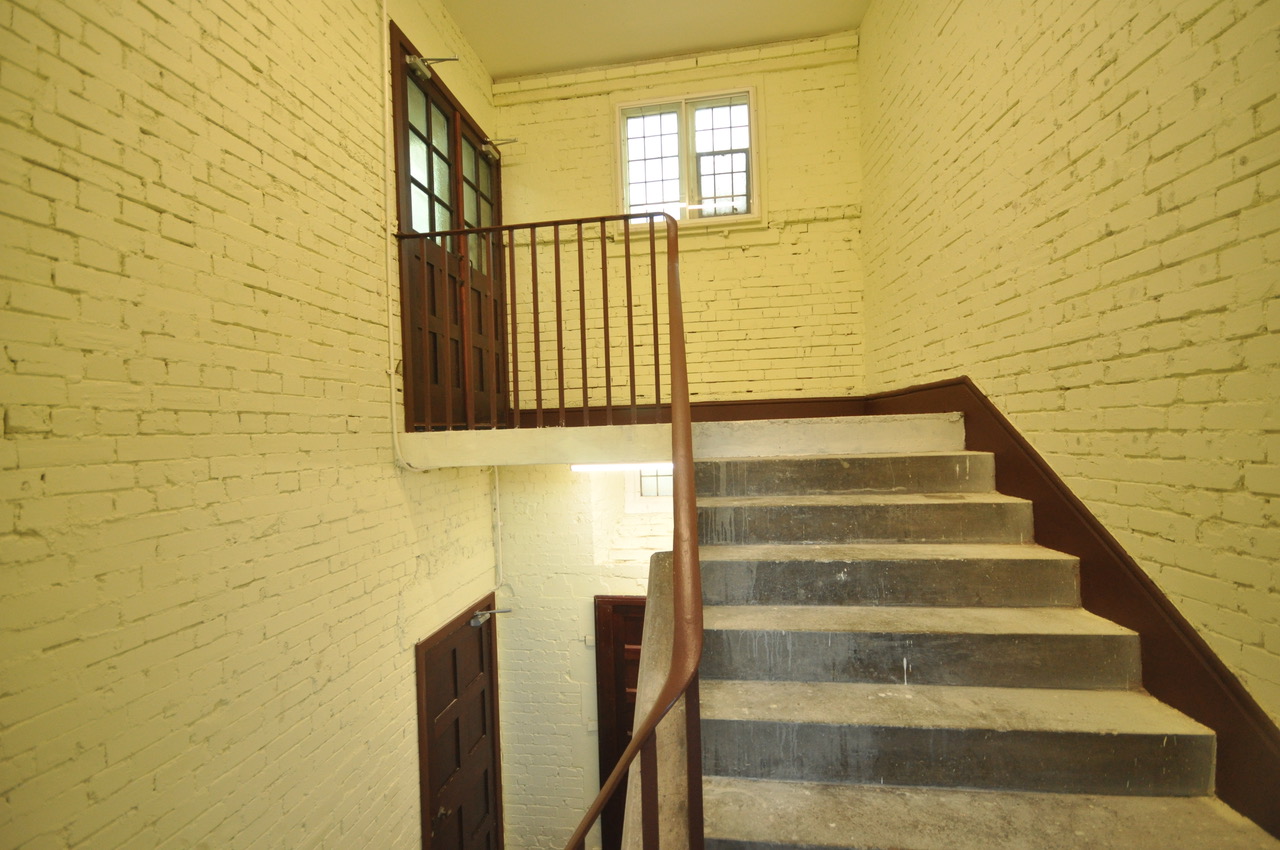
Walls: We intended to reinstate a 12.5mm standard plasterboard with a 3mm plaster skim coat to all the walls affected by the dry rot, but due to the additional works on the external brickwork façade, the architect suggested we paint the exposed brickwork walls directly to make a saving, and transfer those costs to finance the external work on the brickwork facade. Therefore, the internal walls were spray painted to the original colour of the stairwell and lobby.
In conclusion
This was the first time Hyssop Project has worked on a building of this nature and stature and we relish the possibility of future opportunities to work on church buildings with listed status. Because of the experience of working with the client and this type of building, we are now pursuing further work from English Heritage, The National Trust, and the Church of England. The challenges faced were a joy to overcome, meeting all the planning and building control constraints to the point that all certifications were achieved on the client’s behalf.
The client and the congregation are very pleased with the outcome of the work undertaken. During the process of the remedial works they have come to realise that they have a building of historical and heritage importance. There are still several critical projects required to bring the church building back to its original form. Since the completion of the works the church has set up a funding page on their website to raise further funds for those critical works.
For further information visit https://www.erc-hackney.com/giving and www.hyssopproject.co.uk


